2026-11-09
Estimating munition yield from crater diameter in post-strike imagery
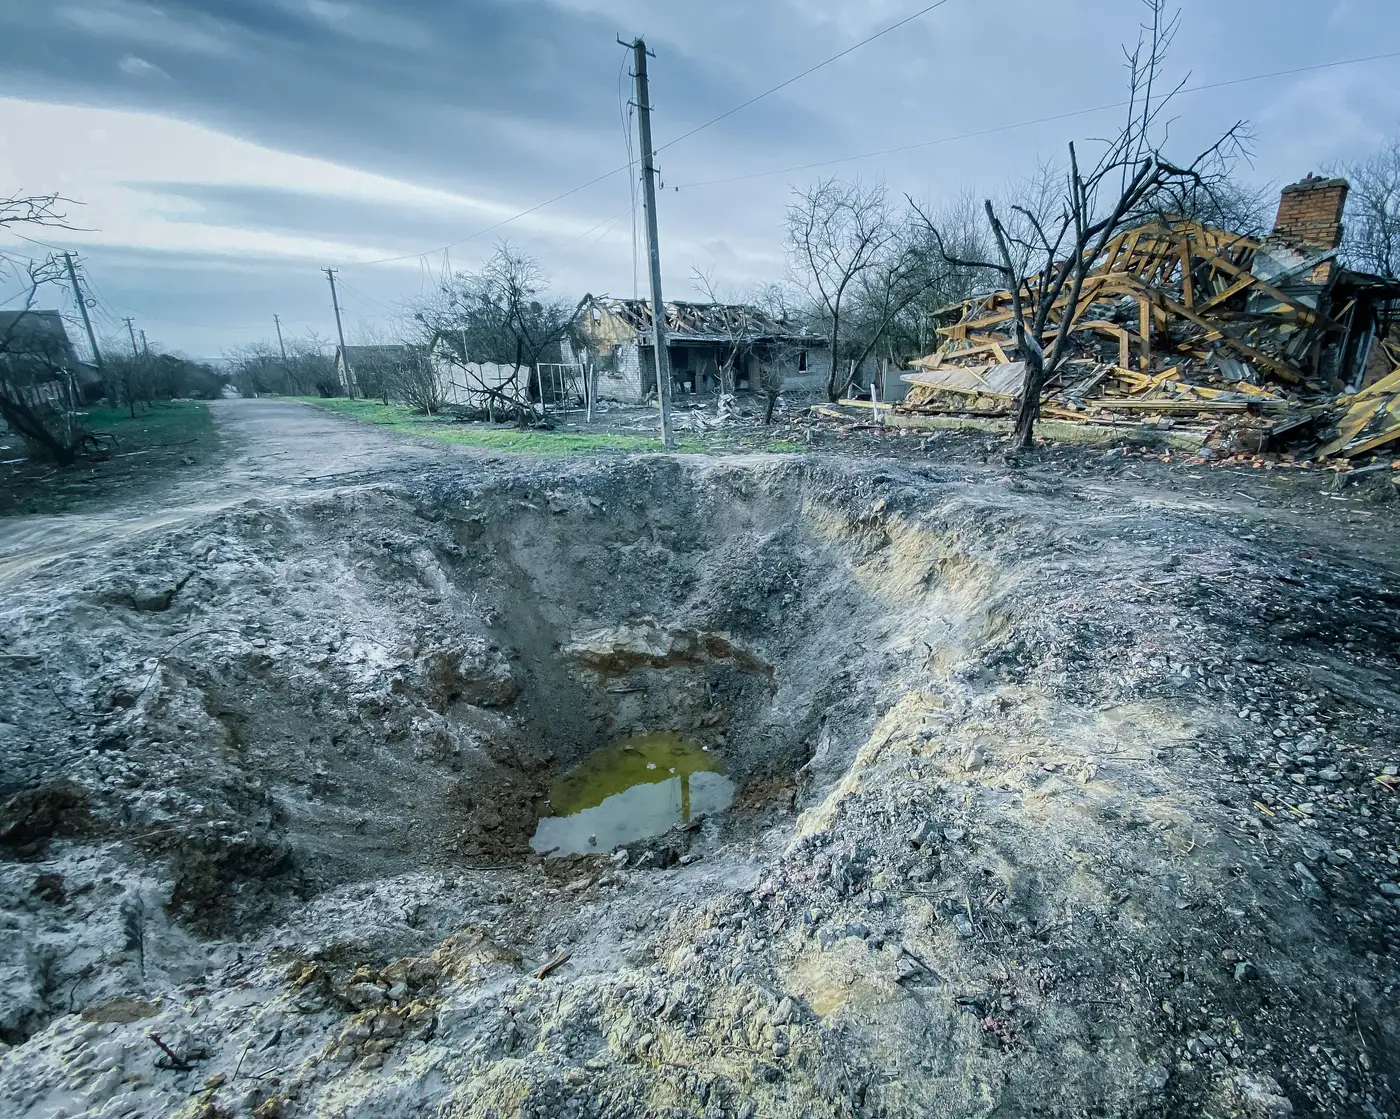
A re-strike board asks the same question every time a new crater shows up in the imagery: what hit it, and how big. When there's no fragment recovery and no ground team within reach, the crater is often the only physical evidence an analyst gets, and the instinct is to back-calculate yield straight from the hole in the ground. That's possible, within limits, but the diameter number alone is a weaker signal than it looks on first read.
Measuring the crater from the imagery
Start with apparent crater diameter, not true diameter. The apparent crater is what you see from overhead: the rim-to-rim span including the lip, measured across at least two orthogonal axes to catch any elongation from an oblique or grazing impact. At GSD ≤0.5 m, each pixel is covering half a meter or more of ground, so a crater in the 8 to 15 m range is only 16 to 30 pixels across. Measurement error at that scale compounds fast if the image is even slightly off-nadir, so analysts pull diameter from the clearest available pass and cross-check against a second collection where the tasking allows it.
Shadow length along the crater lip gives a rough read on depth, which matters for distinguishing a surface burst from a munition that penetrated before detonating. A shallow, wide crater with a modest lip reads differently than a deep, narrow one with ejecta thrown well clear of the rim, even at similar diameters.
From diameter to yield: the scaling problem
The standard approach treats crater diameter as scaling roughly with the cube root of charge weight, for a given soil medium and burst height. That relationship holds reasonably well when you know the medium. It breaks down fast when you don't, because the same charge weight produces a noticeably different crater in loose sand than in compacted clay or exposed rock, and moisture content shifts things further still. Two craters of identical diameter, one in a wadi bed and one on a paved apron, can represent yields that are off from each other by a wide margin.
This is the part that gets skipped under time pressure: a yield estimate from crater diameter is only as good as the soil or surface assumption behind it, and that assumption is rarely confirmed from the air. Without a known burst height, buried versus surface versus near-surface detonation also shifts the diameter-to-yield curve in ways that overhead optical imagery can't resolve on its own. Treat the output as a bracket, not a point figure, and say so in the write-up rather than handing the board a single number dressed up as precision.
Debris throw pattern and ejecta apron radius can tighten the bracket somewhat, as can comparing the crater against known reference craters from munitions with documented yield-to-diameter behavior in similar soil. None of that turns the estimate into a measurement. It stays an inference built on an assumption about what's under the target.
Why the crater is rarely the deciding input
For a re-strike call, yield is usually a secondary question behind a more direct one: is the target functionally destroyed. A hangar with a crater through the apron but a standing roof and intact bays is a different re-strike case than one with the same crater and a collapsed structure. Crater math tells you something about the munition. It tells you much less about whether the facility still does its job, which is the number the board needs before it commits another sortie.
A dated, itemised damage grade for every structure in the target set, built from before and after imagery rather than from crater geometry alone, is what a re-strike board usually wants to see first. Battle Damage Assessment is built around delivering exactly that rather than a yield estimate standing on its own.
If the next tasking lands on your desk with a fresh crater in it, run the yield bracket as supporting detail, but lead the write-up with what the strike actually did to the structure.